Let me explain the layout of the room a bit. When you walk in our front door you're immediately in our living room and to your right is our dining room; it's all one open space. When we bought the house the living room and dining room were painted dark red:


(Ignore the mess, this was the night before moving day)
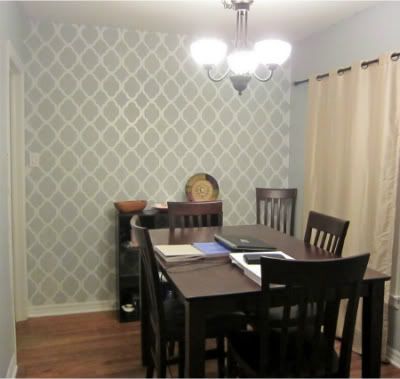
See how dark, depressing, and small it looks? I definitely wanted to lighten the whole room up. So we decided to paint the whole room Olympics' color Secret Passage in eggshell, it's a light gray color. And we decided to do it the night before moving day, we just couldn't wait to get rid of the red. After painting the whole room I definitely knew I wanted to do an accent wall to kind of separate the two rooms. I originally thought to do wallpaper, but after shopping for it we realized it's just too expensive and decided on a stencil wall. First, I will say, I have NEVER stenciled a wall before. So maybe I was a bit over ambitious…. that seems to be how we roll (literally, haha) here as you will notice the more projects I post. I fell in love with this stencil from Cutting Edge Stencils, I just switched up the colors:
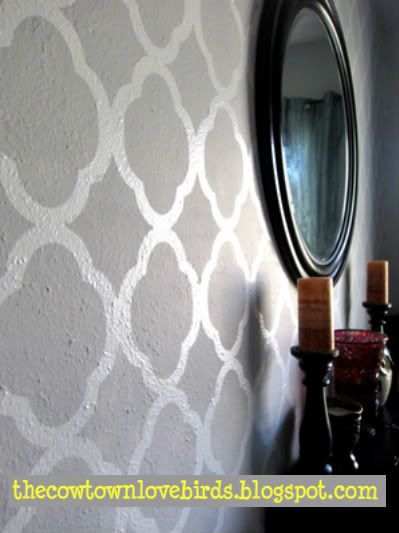
Before I got started I wanted to create more dimension to the wall, so I decided to paint the background a different color and finish. I painted the whole wall with Olympics' Evening Mist in semi-gloss; remember the gray color's finish is eggshell. The background color kind of shimmers and stands out. Once the wall was dry I started the stencil.
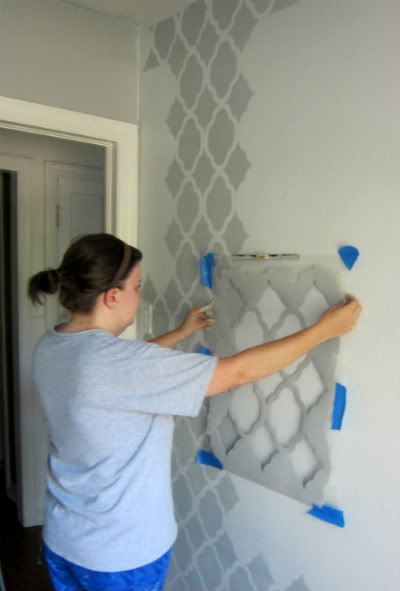
The stencil came with great instructions that I just followed. I first started off by using painters tape to tape off all the edges of walls to keep the lines nice and clean. I started in the bottom center part of my wall because it's kind of hidden in case I screwed up. I then placed pieces of tape around the edges of the stencil to hold it in place. I also used this leveler that just slides on the top of the stencil and keeps everything nice and even, it's a lifesaver!
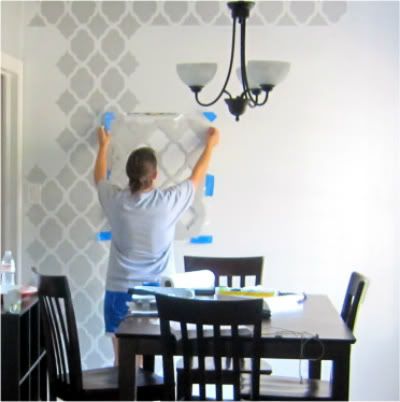
We used a paint tray with the roller. Roll the roller in the paint a couple times, then roll it on a piece of paper towel to remove the excess paint, very important! Then just start rolling very lightly, don't push hard or the paint will bleed though. Once finished, carefully remove the stencil then place it under or above what you just painted and line up the edges, paint, and just keep repeating the process. The corners and edges were definitely the hardest part. But since the stencil is flexible it's easy to bend, like this:

(pic found here)
Use a small angled brush to paint the edges and corners. Once finished painting, you can remove the tape. There will be some areas that didn't come out perfect and need some fixing, but it's just paint to it's super easy. Just use your small angled brush to do touch ups. Then step back and enjoy your masterpiece! The whole process takes time and lot of patience! Note: your hand may be a little sore by the end of it but it's well worth it). Here are some pictures of the process:
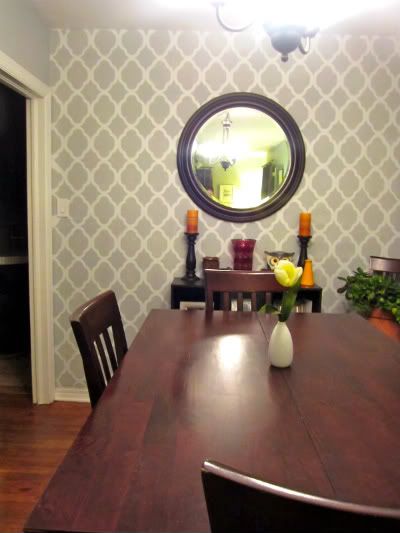
See the difference in the paint finishes?
What do y'all think? Has anyone else done a stencil wall? I'd love to see them!


You did an awesome job!
ReplyDeleteHope you don't mind I pinned your living/dining room to my Pinterest board. Love it!
ReplyDeleteThank You!
DeleteI had no idea you had a blog! So glad to have found it!!! And I l-o-v-e that stencil wall, you did a fantastic job!
ReplyDeleteThanks Chrissy!! I'm kind of new to blogging but I've been reading other blogs for a few years now. I thought now that we have a house and lots of projects I should just get one of my own and I love it. I love your blog too!! :)
Delete